
Table of Contents

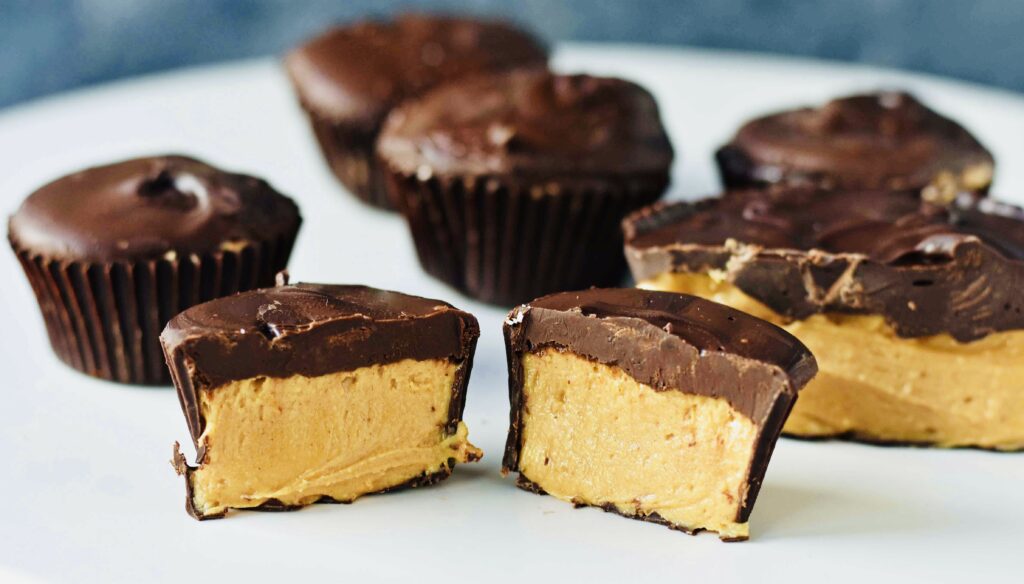
Peanut butter cups are a delightful and popular confectionery treat loved by many. These delectable sweets consist of a smooth and creamy peanut butter filling encased in a layer of rich milk chocolate. The iconic combination of peanut butter and chocolate creates a perfect balance of flavors, making them irresistibly scrumptious.
Originally invented in the 1920s, peanut butter cups gained widespread popularity after the renowned candy company, Reese’s, introduced their version in the 1920s. Since then, they have become a staple in the world of candies and are often associated with comfort and indulgence.
The process of making peanut butter cups involves molding the peanut butter mixture into small cups and then dipping them into melted chocolate. They come in various sizes, from bite-sized minis to larger cups, catering to different preferences.
These treats have become a versatile ingredient and are often used in baking and desserts, such as in brownies, cookies, and ice cream toppings. Peanut butter cups continue to be a favorite treat for people of all ages, making them a timeless classic in the world of sweets.
All About Peanut Butter Cups Recipe:

Ingredients Of Peanut Butter Cups Recipe:
For this recipe, you will need the following ingredients:
- 1 cup creamy peanut butter
- 1/4 cup unsalted butter, softened
- 1/2 cup powdered sugar
- 1/4 teaspoon salt
- 2 cups semi-sweet chocolate chips
- 1 tablespoon vegetable shortening (optional)
Step By Step Instructions Of Peanut Butter Cups Recipe:
Step 1: Prepare the Peanut Butter Filling
In a mixing bowl, combine the creamy peanut butter, softened unsalted butter, powdered sugar, and salt. Stir the ingredients together until well combined and smooth. The mixture should have a thick, creamy consistency that is easy to work with. Taste the filling to ensure it has the desired level of sweetness and peanut flavor.
Step 2: Melt the Chocolate
To melt the chocolate, you can use a double boiler or the microwave. If using the double boiler method, fill a saucepan with water and place a heatproof bowl on top, making sure the water doesn’t touch the bottom of the bowl. Add the chocolate chips and the optional vegetable shortening to the bowl. Heat the water on low-medium heat, stirring the chocolate occasionally until it’s fully melted and smooth. Alternatively, if using the microwave, place the chocolate chips and shortening in a microwave-safe bowl and heat in 30-second intervals, stirring in between, until the chocolate is melted.
Step 3: Line the Muffin Pan
Line a muffin pan with paper or silicone cupcake liners. This step prevents the peanut butter cups from sticking to the pan and makes them easier to remove later. You can use a standard-sized muffin pan or a mini muffin pan, depending on your preference.
Step 4: Layer the Peanut Butter Cups
Spoon a small amount of melted chocolate into the bottom of each cupcake liner, spreading it to cover the entire bottom evenly. Place the muffin pan in the freezer for about 5 minutes or until the chocolate sets.
Once the chocolate layer is firm, remove the muffin pan from the freezer. Use a spoon to place a dollop of peanut butter filling on top of the chocolate layer in each cup, making sure to leave a small border of chocolate around the edges.
Step 5: Seal the Peanut Butter Cups
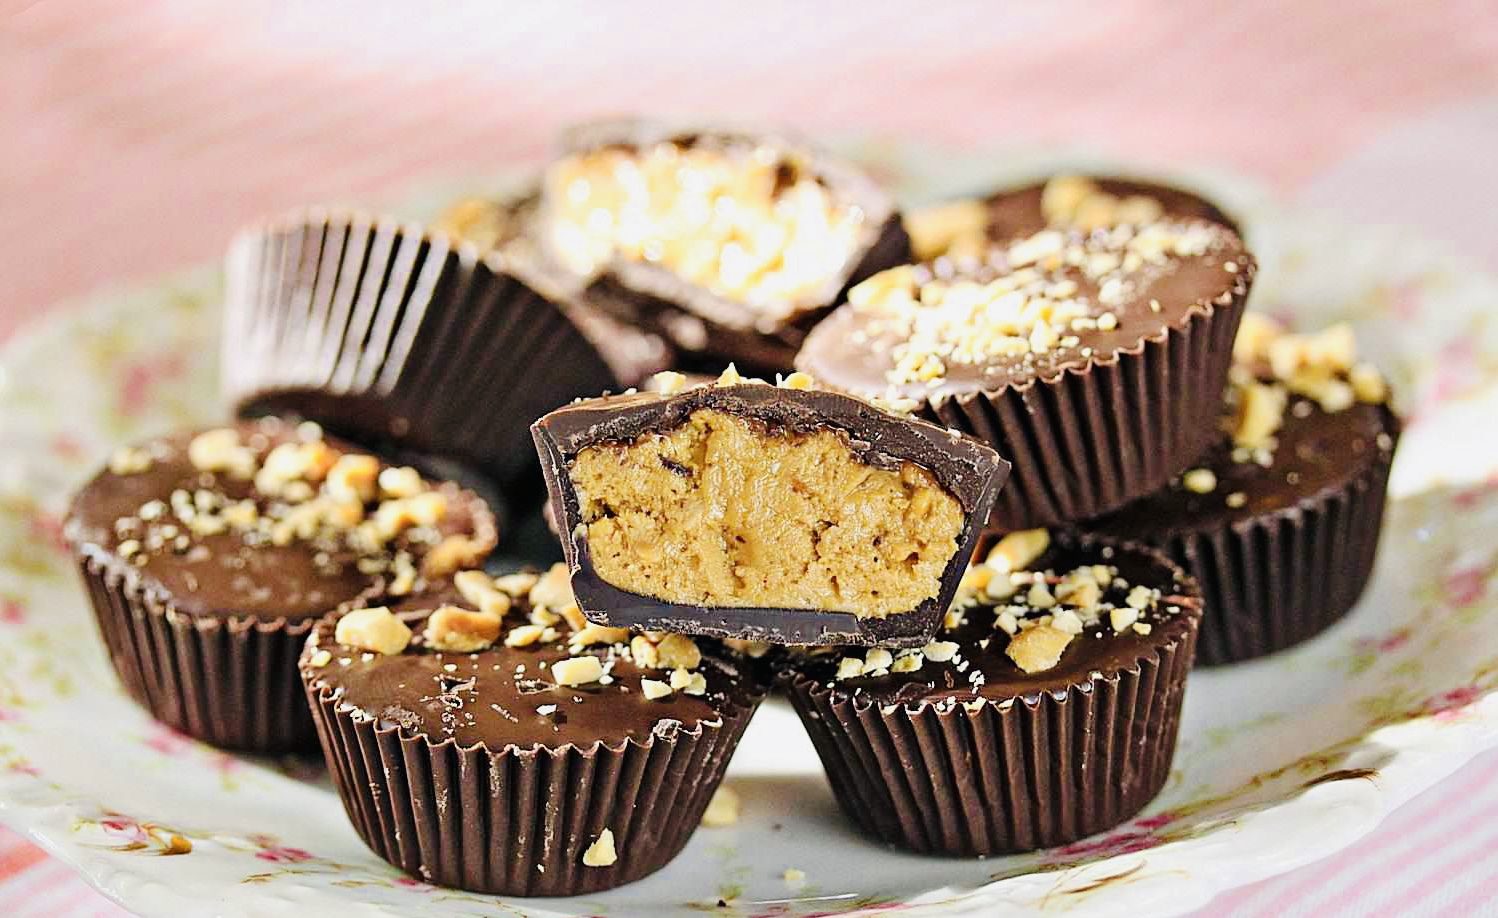
With the peanut butter filling in place, add another layer of melted chocolate on top, ensuring it covers the peanut butter completely. Smooth out the top layer with a spoon to make it even.
Step 6: Chill and Store
Place the muffin pan back into the freezer for at least 20 minutes to allow the chocolate to set fully. Once the peanut butter cups are firm, remove them from the muffin pan and transfer them to an airtight container for storage. You can keep them in the refrigerator for up to two weeks, or in the freezer for longer shelf life.
Congratulations! You have successfully made delicious homemade peanut butter cups. Enjoy them as a delightful treat for yourself or share them with family and friends.
Related Post:
Oreo Milkshake Recipe | Just In 6 Easy Steps.
Butter Pecan Ice cream Recipe | Just In 10 Easy Steps.
Watermelon Granita Recipe | Just In 8 Easy Steps.
Rice Pudding Recipe | Just In 6 Easy Steps.
Nutella Brownies Recipe | Just In 7 Easy Steps.
-
Peanut Butter Cups Recipe | Just In 7 Easy Steps.
Peanut butter cups are a delightful and popular confectionery treat loved by many. These delectable sweets consist of a smooth…
4 thoughts on “Peanut Butter Cups Recipe | Just In 7 Easy Steps.”